Nanny Linda’s Mandel Bread
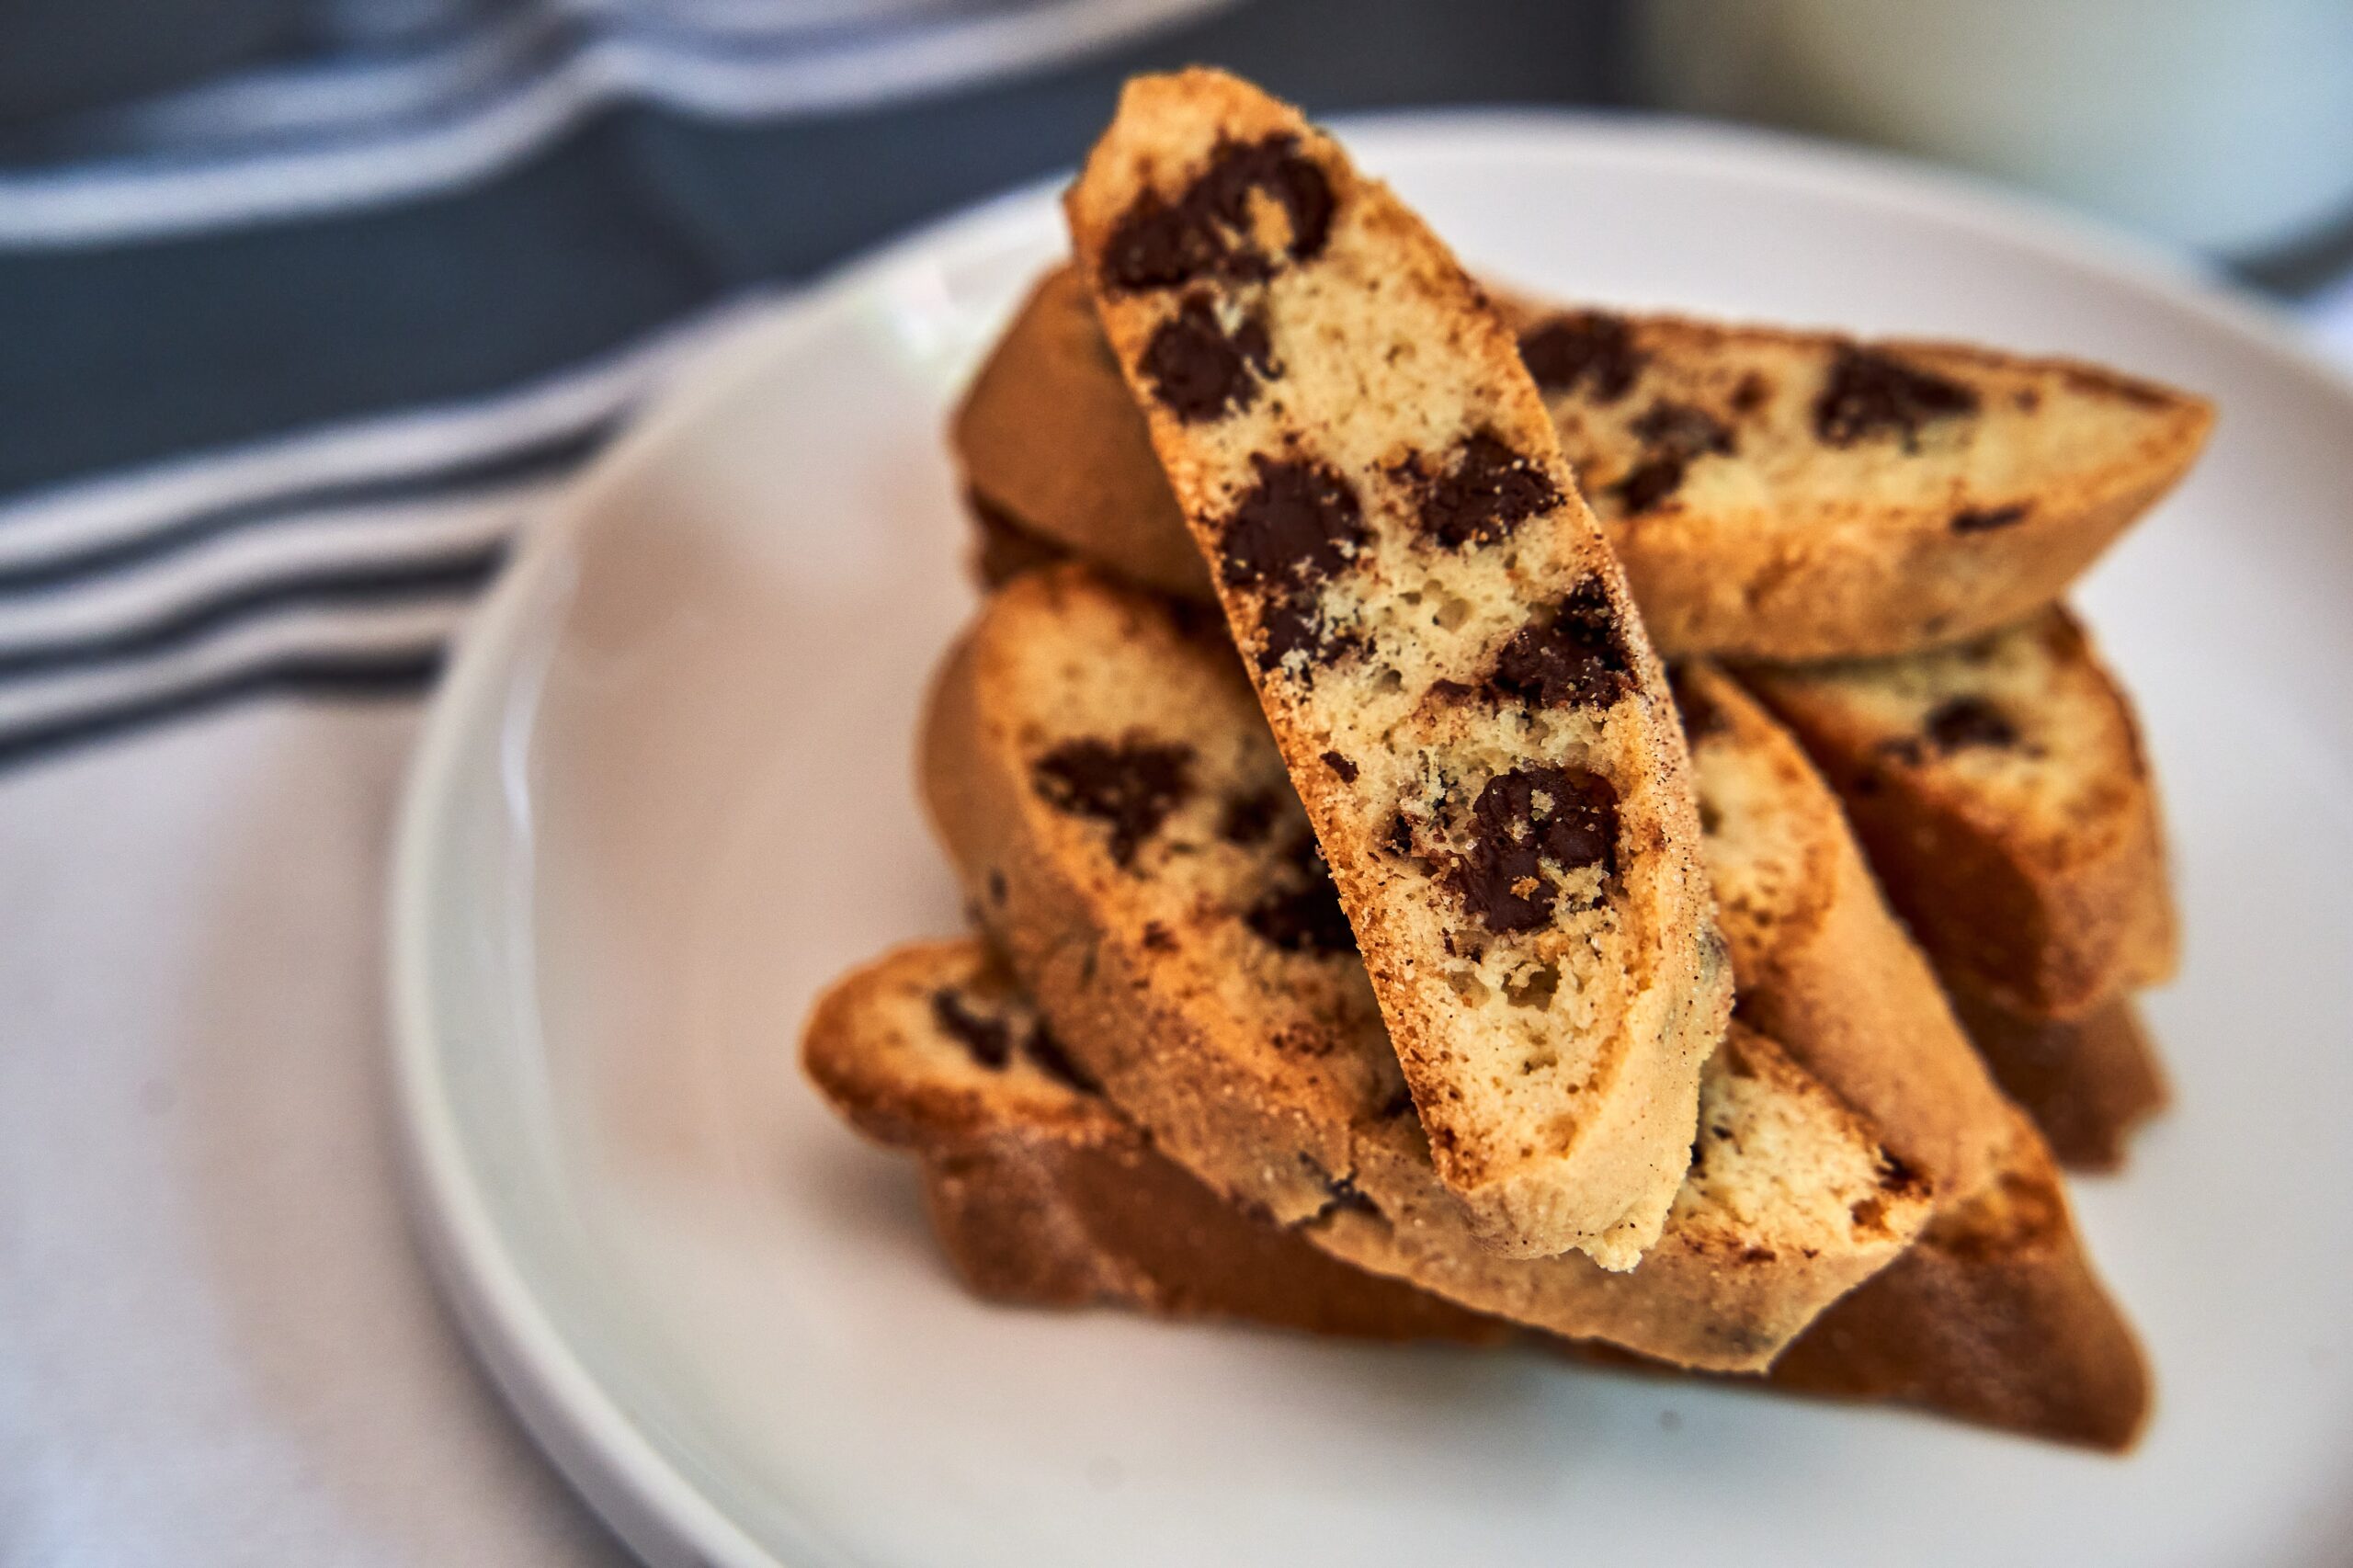
I bet you’re wondering, “what in the world is mandel bread?!”. Most think it’s bread, when in fact it is more of a cookie/biscotti. Mandel bread is a type of cookie found in Ashkenazi Jewish cuisine. In Yiddish, the word “mandelbrot” means almond bread.
My Nanny (paternal Grandmother) is an amazing baker and gave me an entire lesson on baking mandel bread in February 2020, right before everything shut down from COVID. I am so lucky that I got to spend that time learning from her so that I was able to make it on my own as a sweet treat when I was missing family throughout the pandemic at its worst. But even though I know how to make it myself, Nanny will always make it the best!
Nanny has been making mandel bread since the late 90s. After a lot of testing and tweaking, she has perfected her recipe. Over the years, Nanny has shared this recipe with her closest friends, and now I am so happy I get to share it with you!
I really enjoy mandel bread right out of the freezer because that’s where Nanny stores hers. Whenever we go over and visit she always lets us take a piece from the freezer and it is a delicious memory!
Something important to note is that you never have to double bake the ends of each loaf; those are a special treat for the chef and whoever else you decide to share them with! I hope you enjoy this yummy recipe as much as my entire family and I do!


Below you will find a carousel of photos that goes through the steps (once the dough is made) of making the mandel bread to make it easy to visualize!


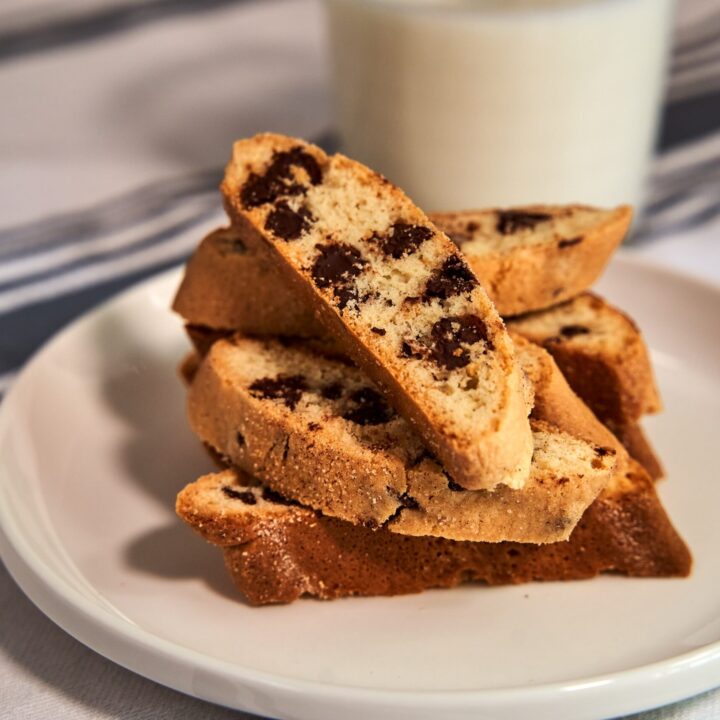
Nanny's Mandel Bread
Ingredients
- 3 large eggs
- 3 cups flour
- 1 cup sugar
- 1 teaspoon vanilla extract
- 1 teaspoon almond extract
- 1 teaspoon lemon juice
- ½ cup vegetable oil
- 2 teaspoons baking powder
- ½ teaspoon kosher salt
- 2½ cups semi-sweet chocolate chips
- 1 cup chopped nuts (optional)
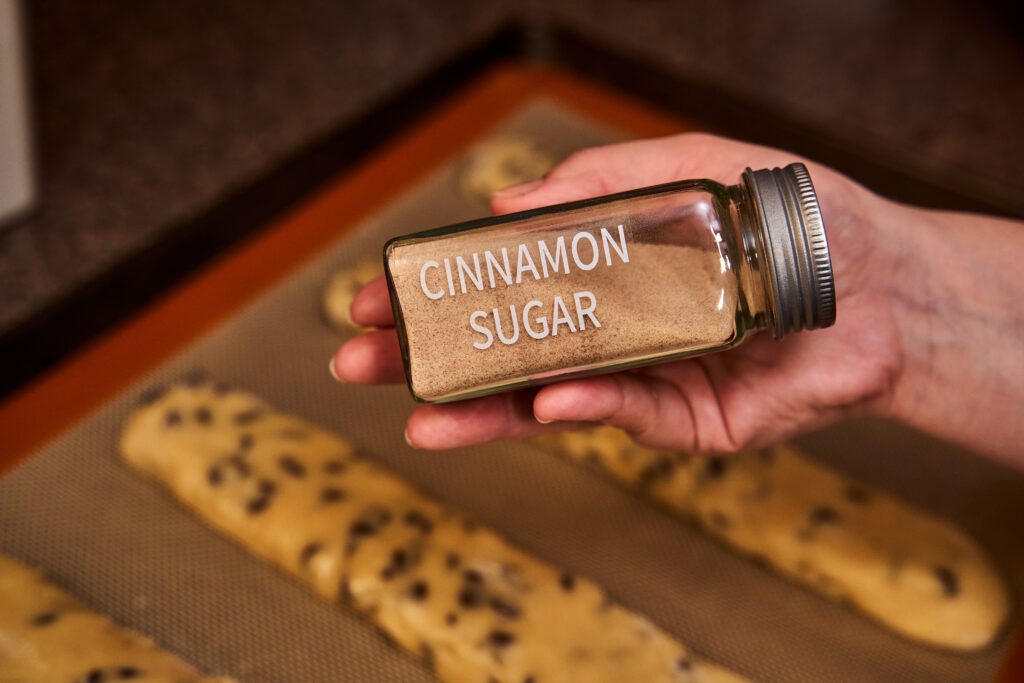
- Cinnamon and sugar for sprinkling
Instructions
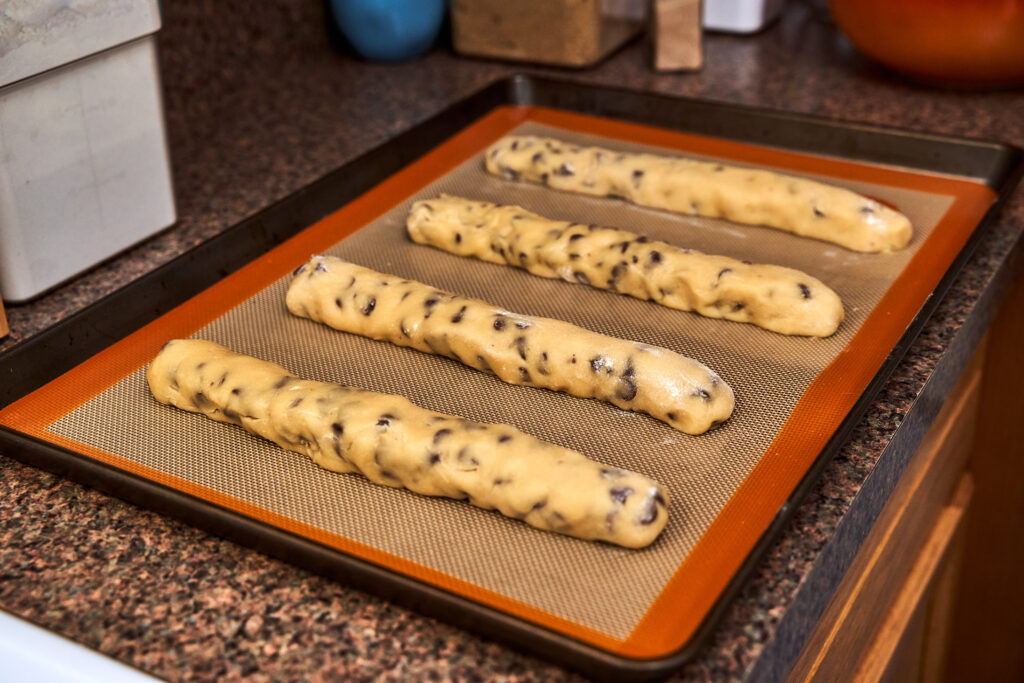
- Prepare 2 baking sheets with parchment or silicone baking mats.
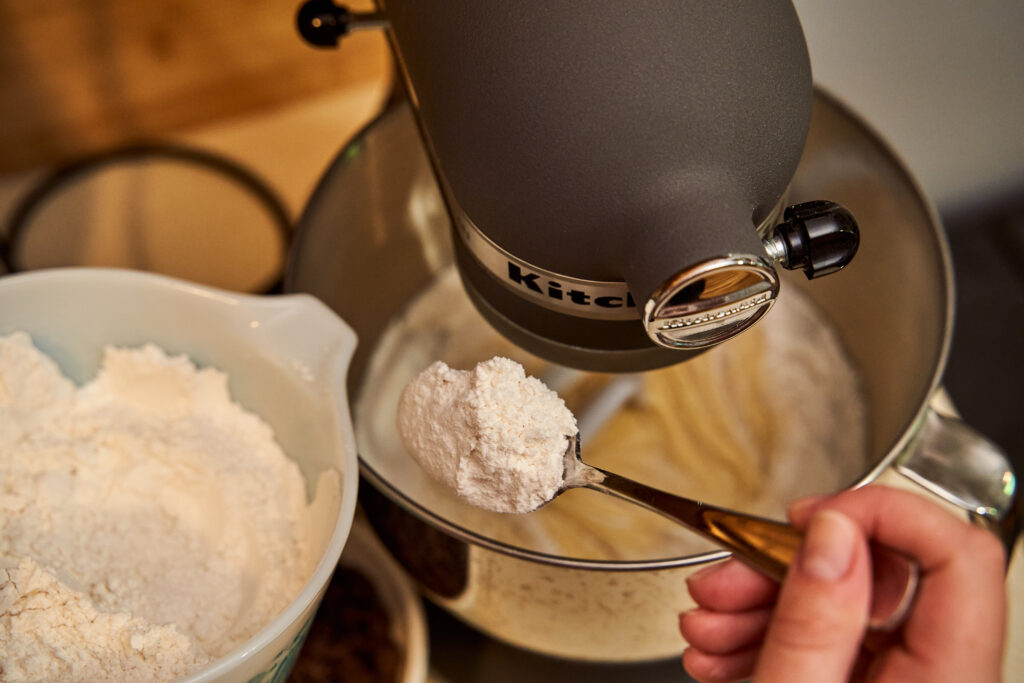
- In a medium bowl, whisk together flour*, baking powder, and salt.
- In the bowl of a stand mixer or in a large bowl using a hand mixer, beat the oil and sugar.
- Add 1 egg at a time to the mixture, beating 30 seconds between each egg.
- Mix in vanilla extract, almond extract, and lemon juice.
- Gradually add the flour mixture a little at a time.
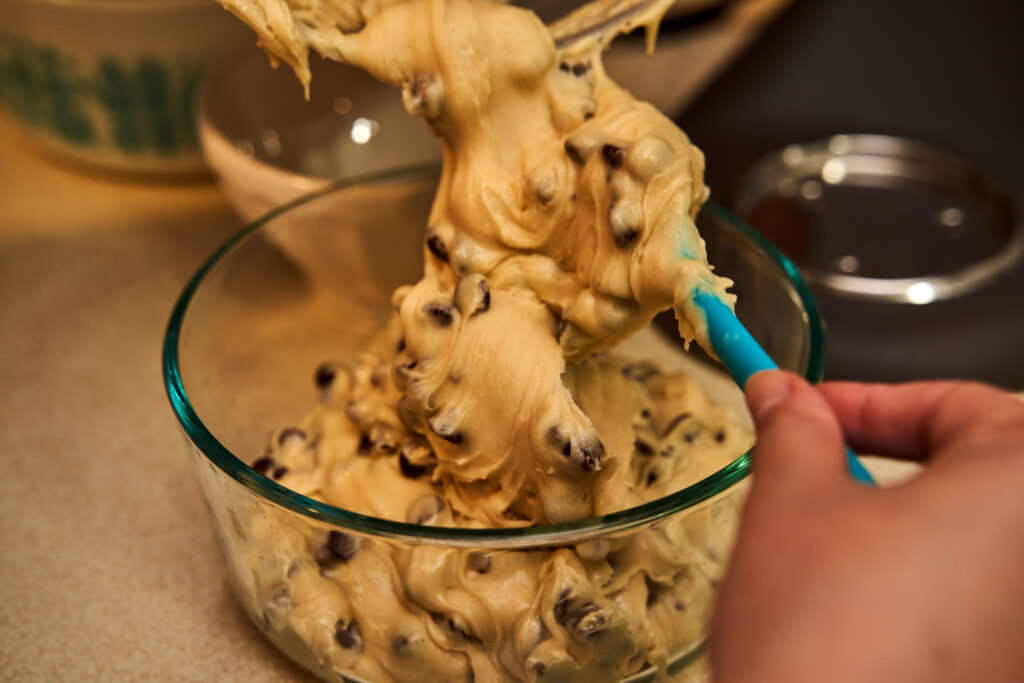
- Fold in chocolate chips and nuts. You can do this by hand with a spatula or do a few quick pulses with the stand mixer.
- Refrigerate for a few hours or overnight.
- Preheat oven to 350 degrees F.
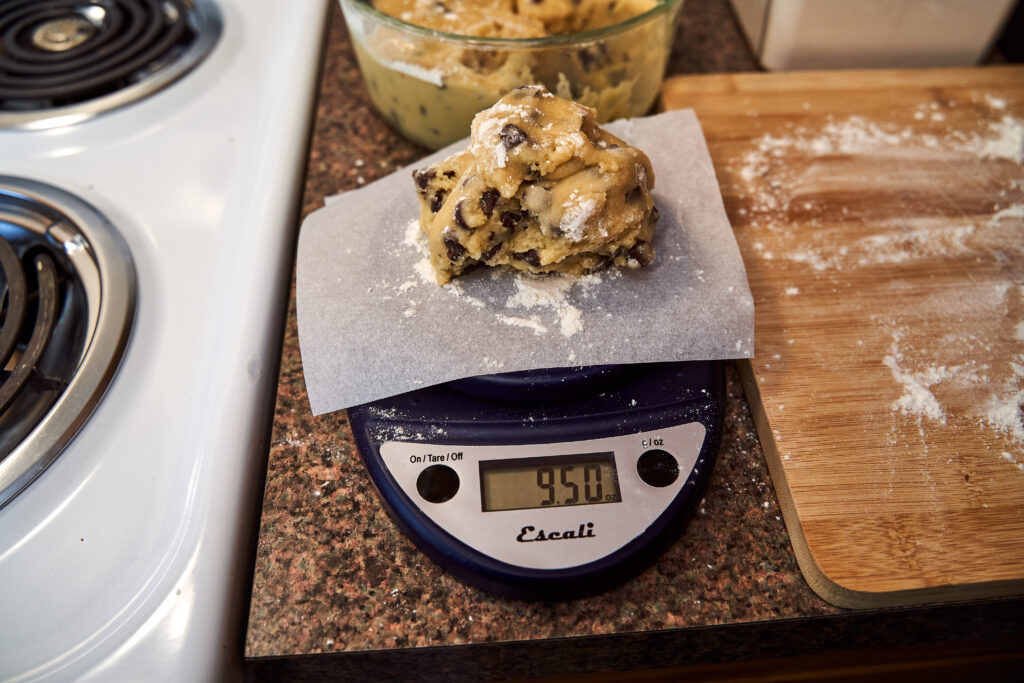
- Flour your work surface and hands, as the dough is very sticky.
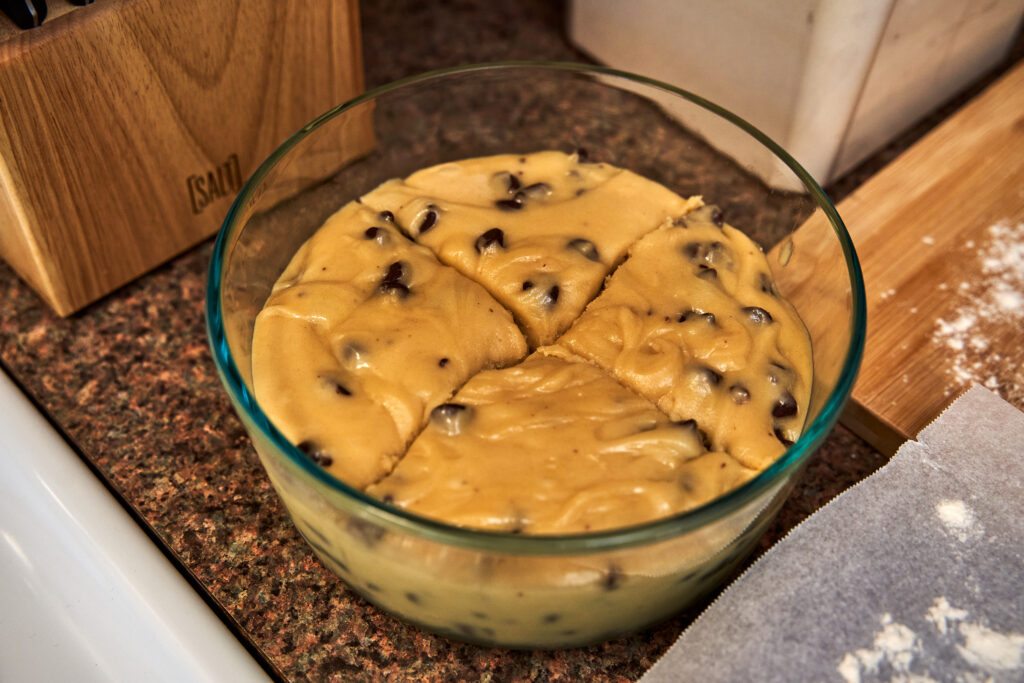
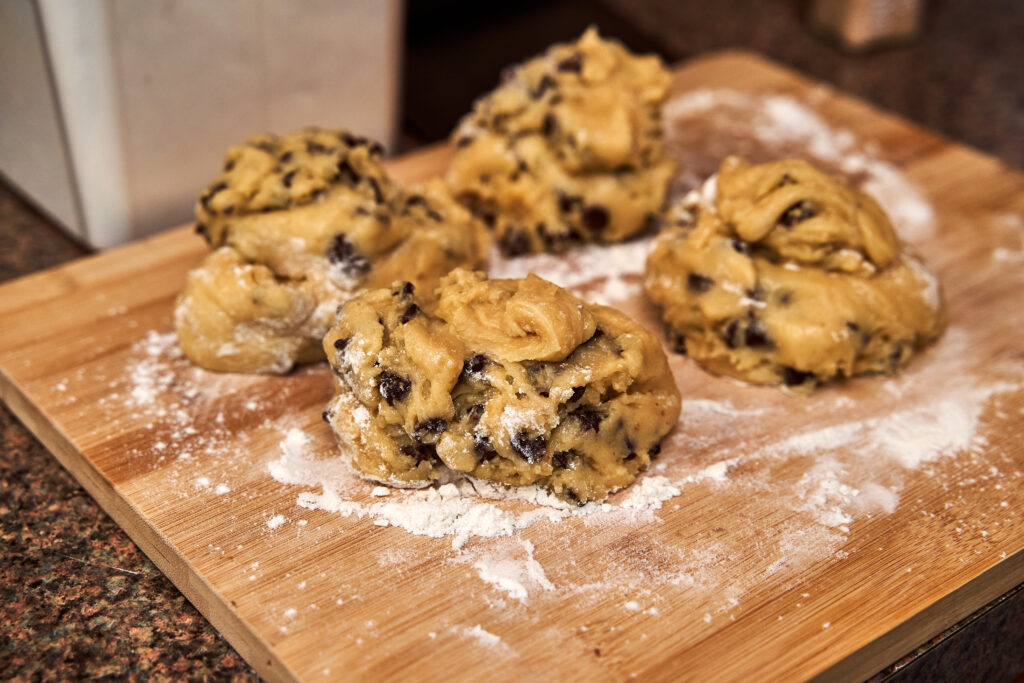
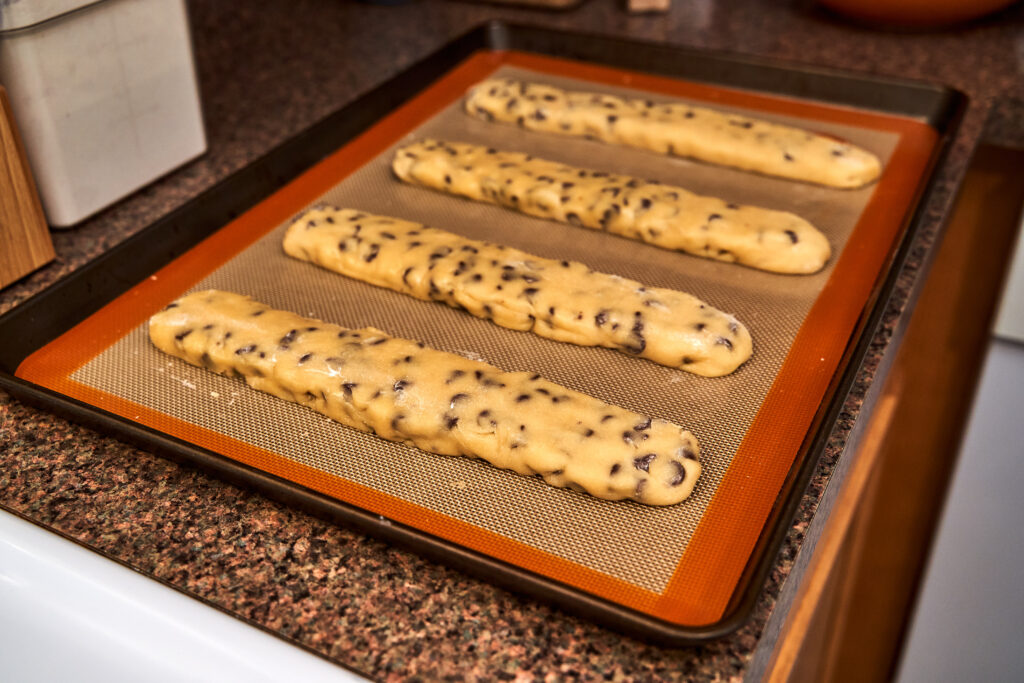
- Split the dough mixture into four even pieces. I find it is easiest to use a kitchen scale to make sure they are as even as possible.
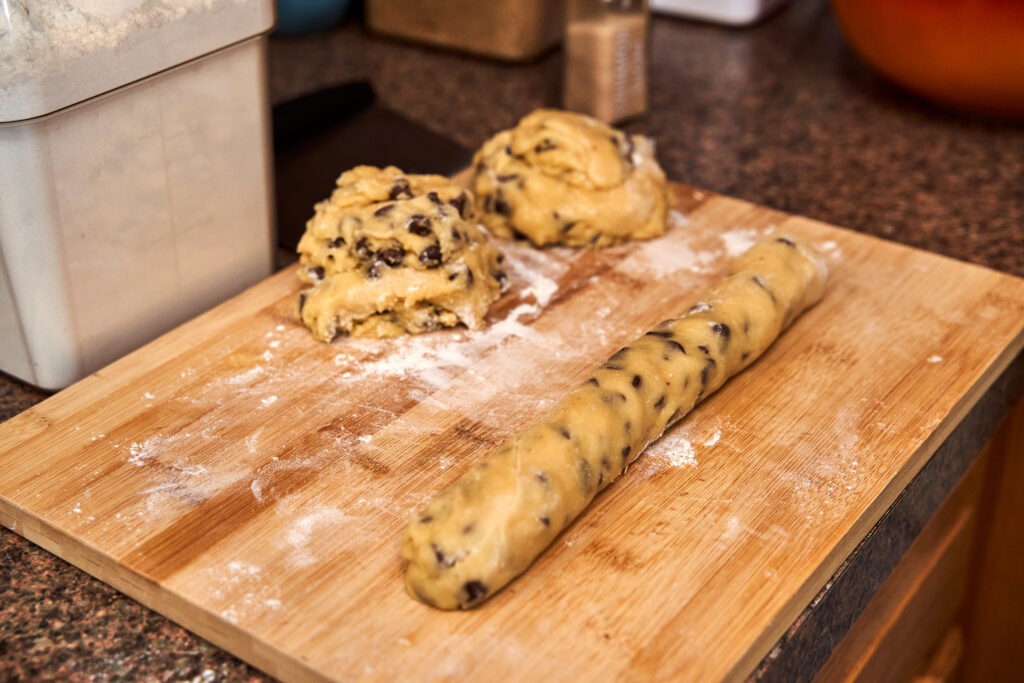
- Take each piece of dough and roll it into a log that is about 1.5 inches thick and 12 inches long and place them on your baking sheets.
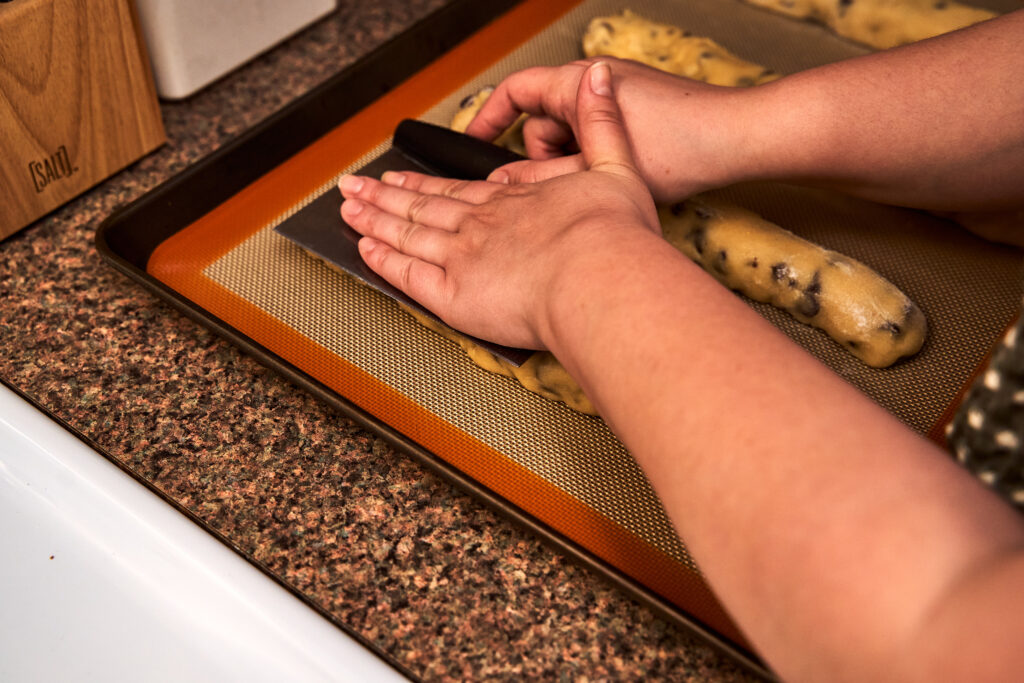
- With your hands or a bench scraper, flatten the tops and sides a little bit.
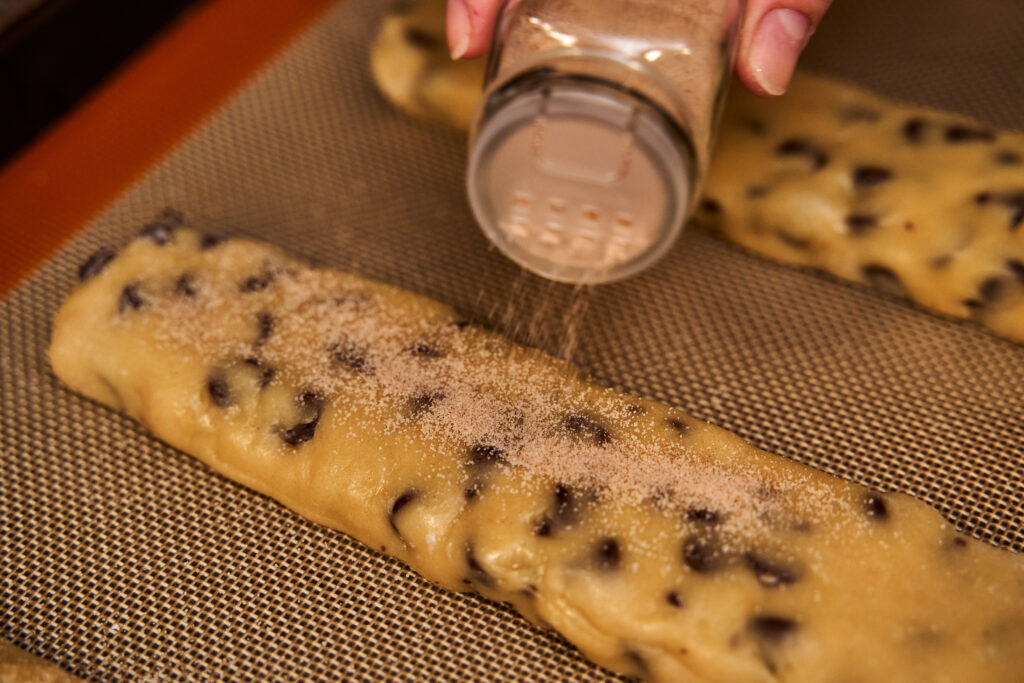
- Sprinkle the tops with the cinnamon and sugar mixture.
- Bake for 30 mins or until the logs are lightly browned.
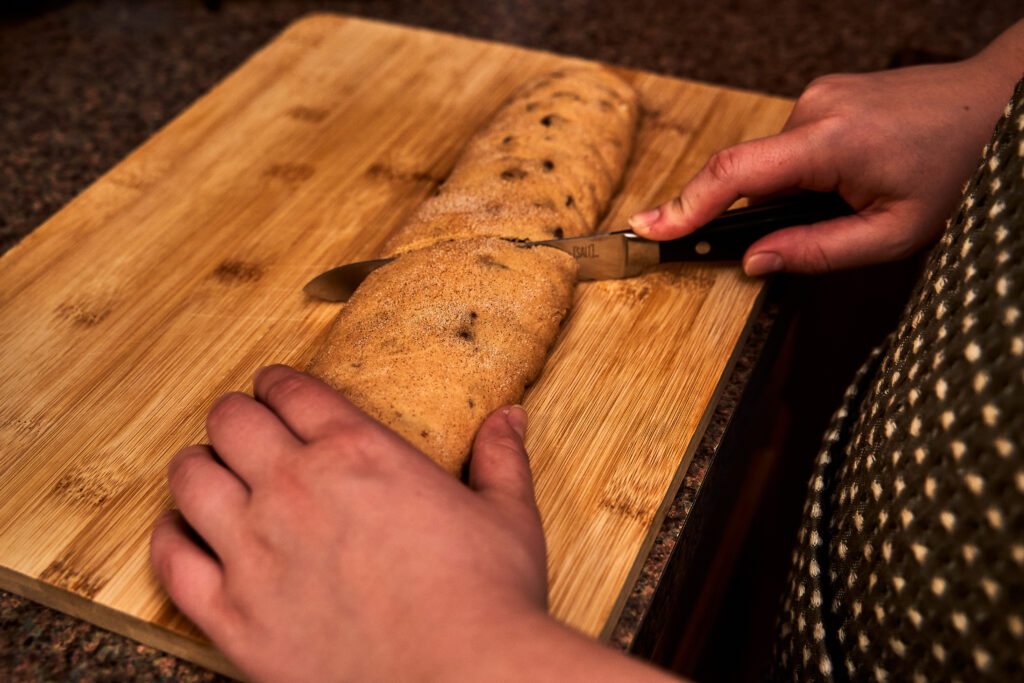
- Remove from oven and let cool for 5 minutes.
- Lower oven to 300 degrees F.
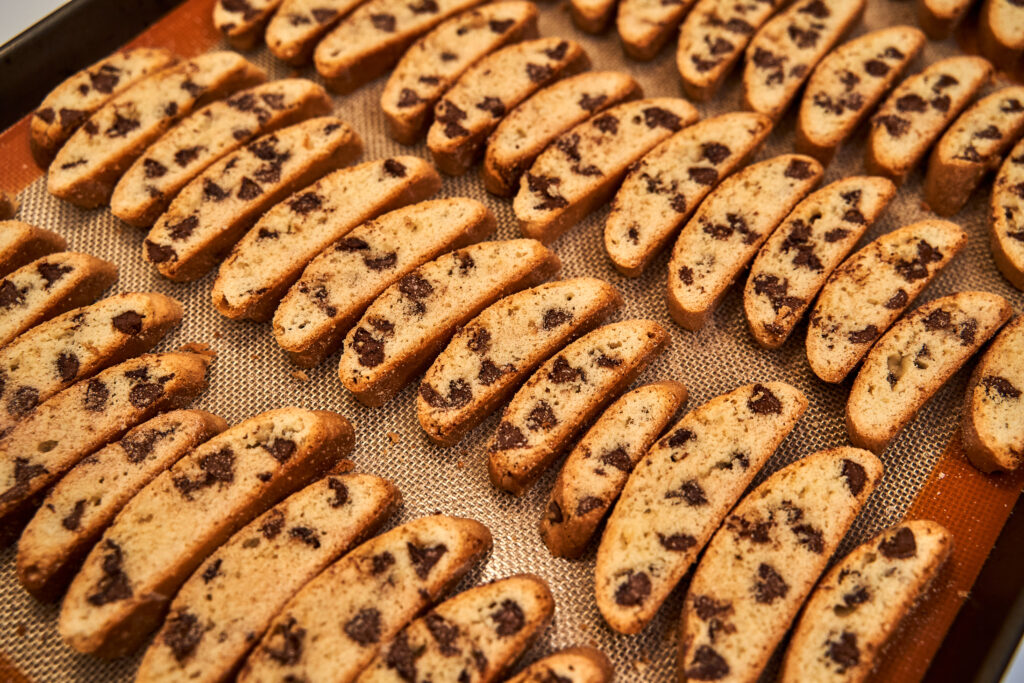
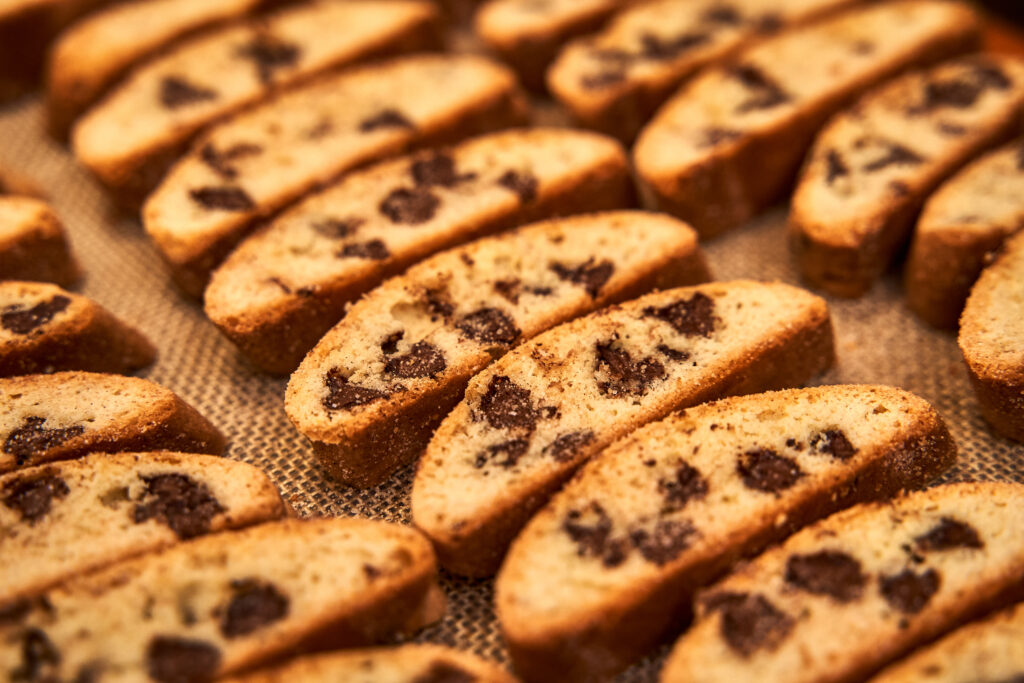
- Transfer the logs one at a time to a cutting board and slice on a diagonal with a serrated knife. Start by cutting the loaf in half at a diagonal and cut each half into about 8 slices.
- Lay pieces back on the baking pan with one cut side up.
- Sprinkle the side facing up with cinnamon & sugar mixture.
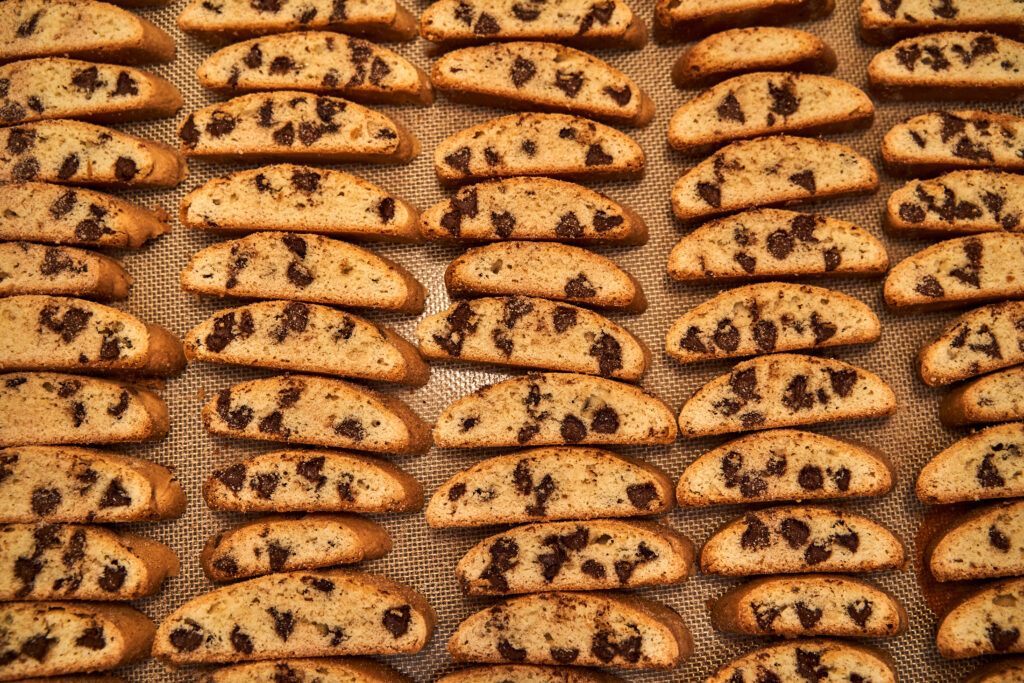
- Place back into the oven for 10 minutes, flipping them over halfway through.
- Cool completely on a wire rack and store in an airtight container.
Notes
1. Always use the spoon-and-sweep method when measuring flour. This is when you fill the measuring cup with flour using a spoon and then use a straight edge to level it off. This will give you the most accurate measure of flour.